

6 Tips For Achieving Creamy Ice Cream and Gelato
+ Notes on How to Make Creamy Ice Cream with a KitchenAid Attachment

Please consider becoming a paid subscriber. It’s only $30 a year. That’s like one shitty cookbook! Upon becoming a paid subscriber you will receive a copy of my Burnt Basque Cheesecake Cookbook Zine! Or you can buy a copy here for only $2.
I think I am starting to get it! Ice cream making that is. I mean, to be completely honest, I still feel like ice cream has a mind of its own, but at least the pieces are starting to fit together. Or maybe that’s exactly what it wants me to think.
Okay, get to the point. I know.
My main goal for today is to share with you a list of helpful ice cream and gelato making tips that will help you achieve creamy results.
I came across these tidbits of ice cream making knowledge in the various ice cream and gelato making resources I have been consulting in my own educational journey of this craft. I say various, but it is an absolute pile of books, articles, videos, and whatever else stacked to the ceiling. For my complete bibliography of ice cream making and science resources please see my previous article, Part I of My Ice Cream Making Curriculum.
Let’s dive in!

Creamy Ice Cream and Gelato Making Tips:
TIP 1.
Skim Milk Powder (SMP) Is Your Friend: I wish someone would have told me right out the gate just how important this single ingredient is in ice cream and gelato making. Maybe it’s a secret ingredient when people talk about their guarded secret ingredient. If it isn’t, it probably should be.
This one easily available ingredient in the majority of U.S. grocery stores can drastically improve the texture, mouthfeel, and creaminess of your ice cream and gelato, as well as enhance viscosity of your bases giving the final product more body and stability.
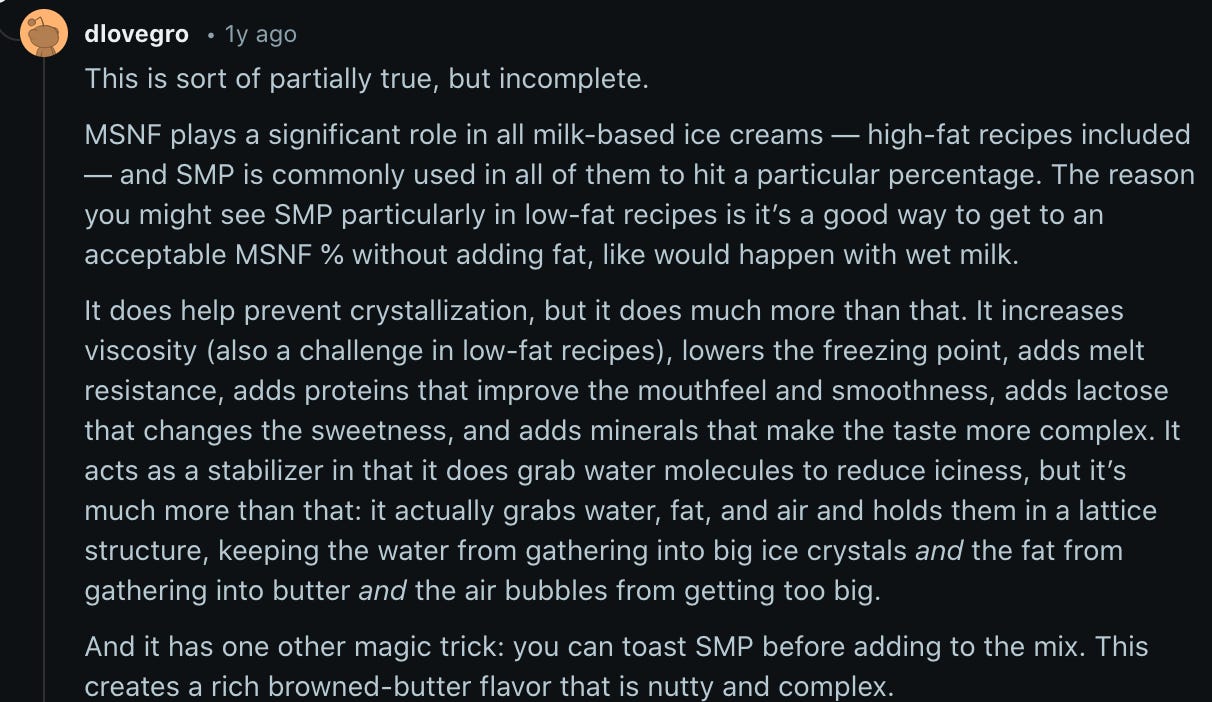
What exactly is its function? Let’s start by looking at milk. Milk, an essential ingredient in gelato making, is largely water (somewhere around 87%). That is a lot of water! One of the most important roles of skim milk powder is to increase the milk solids-not-fat (MSNF) without changing the fat content of your frozen dessert bases. This helps to stabilize (or retain) a lot of that free water that would otherwise result in an icy final product. But that’s not all folks, there are a lot of other benefits to this seemingly insignificant product. I found this helpful summary on Reddit of all the different benefits of using SMP:
The two major components of SMP are protein (around 38%) and lactose (around 50%). From an ice cream science perspective milk protein is a very good emulsifier. Which is why using SMP in your ice cream recipes will result in a creamier product. The milk proteins also help trap and incorporate air during the actual churning process. While the lactose (milk sugars) in SMP acts as a stabilizer by binding (absorbing and retaining) free water in your base which prevents the formation of large ice crystals resulting in smaller ice crystals giving the final product a creamier and smoother mouthfeel.
Helpful Info: According to Nick from Polar Ice Creamy, the use of SMP mirrors the pasteurization process of commercial ice cream making; during pasteurization water evaporates increasing milk solids.
Helpful Info: Whole Milk Powder is not the same thing! It can not be used as a substitute for skim milk powder. If you were to use whole milk powder instead of SMP you would be altering the fat content of whatever formula you are using which would require you to re-balance the formula to account for the extra fat.
I actually tried making a couple recipes with whole milk powder and it had the most awful flavor.
Helpful Info: It took me way too long to come across this information so I wanted to make sure to share it with you all but too much SMP can result in a grainy or sandy texture in your ice cream. It is suggested to keep SMP under 10% of the total weight of your mix (I am actually a little blurry on this point so if anyone has insight please do share). From an ice cream science perspective this happens because the lactose in SMP isn’t very soluble.
Helpful Info: If you are on the hunt for a super creamy and dairy forward ice cream, especially if you make a lot of fior di latte like I have been, I will be writing a separate article on my fior di latte experiments, please note that the use of SMP will enhance the milky or dairy notes in your gelato.
TIP 2.
Don’t Be Afraid of Stabilizers and Emulsifiers: There seems to be a lot of stigma regarding these two in the ice cream making world. There are several ice cream making books that pride themselves on only using “natural” ingredients in their ice cream making.
This rhetoric of stabilizers being unnatural is super bizarre to me and seems to be some weird marketing tool trying to drive sales based on fear tactics. What makes me laugh is that almost every stabilizer and emulsifier I have used in my ice cream making I bought at local Natural Food Stores. So how can products sold by NATURAL FOOD AND HEALTH STORES be deemed by certain ice cream makers as unnatural? Doesn’t make sense, right? Okay, so natural food stores might not be the ultimate arbitrator of what is healthy, real, or whatever. I know you can’t generalize and assume that just because it’s sold at a health store it is inherently good for us given that this entire food industry is rife with deregulation, misnomers, marketing and all sorts of pitfalls. But demonizing the entire family of stabilizers is beyond silly. Especially if you don’t want to use eggs in your ice cream and gelato recipes, you’re just hurting your chances of producing the results that you want, if you don’t take the time to look at individual stabilizers and emulsifiers.
We don’t need to be running away from big scary words. Stabilizers and emulsifiers can include ultra processed things, but they also include all of the natural ones that come from plants (beans, trees, fruit), seaweed, fermented sugars, and so on. Interestingly, my partner uses some of them in his art making such as boiling seaweed to make binding agents or sugars for photo emulsion—some of these processes are hundreds of years old, if not older. There are certainly industrial ultra processed grade stabilizers that a lot of ice cream manufacturers use. These companies prioritize cutting costs over making quality ice cream, but this doesn’t mean that we should be throwing the baby out with the bathwater.
There are plenty of natural alternatives for you to try. But for those of us just getting started it can be quite disorienting to understand why there is so little nuance out there on this topic. We definitely should not be lumped in things like locust bean gum (also known as Carob Bean Flour), citrus fiber, carrageenan, guar gum, xanthan gum, sunflower/soy lecithin, tara gum, tapioca starch, etc. with commercial industrial grade ultra processed stabilizers.
If you want to learn more about stabilizers please check out my previous post for a full list of stabilizer specific resources. Nick from Polar Ice Creamery does a great job demystifying these ingredients!
Also remember that we are using tiny and I mean tiny quantities of both stabilizers and emulsifiers. Sometimes less than a gram, as you will see in my next post where I share one of my favorite recipes for Malted Milk Ice Cream.
TIP 3.
Keep Everything As Cold As Possible: Temperature, be it in baking or ice cream making, is an incredibly important factor that will for sure impact the quality of your final product. The ideal temperature for your ice cream base is 40 F or 4 C. Some folks even recommend putting the ice cream/gelato base in the freezer for 10 to 15 minutes before churning.
Additionally, if you are like me and using a non-compressor ice cream machine (aka something with a pre-frozen canister), do not remove the canister until you have everything ready to go. You absolutely cannot risk losing any of that cold since the pre-frozen canisters start warming up as soon as they leave the freezer.
Helpful Info: If using a frozen canister you have to make sure that your freezer is set to a low enough temperature. According to ice cream sources such as Ice Cream Science your freezer should be set to at least -0.4 F or -18 C. The colder you can get the canister the smoother and creamier your ice cream and gelato will be since the goal is to churn our frozen desserts as quickly as possible. Just remember that the less time your ice cream spends in the machine the smaller the ice crystals will be and the less likely you are to get icy results.
My freezer is set to 0 F or -18C and I have been able to achieve solid results. If you are able to go lower definitely do, as mentioned on the Ice Cream Science blog the results will continue to improve if you can get an even lower freezer temperature, they suggest -14.8 F or -26 C for example.
Helpful Info: If you have a KitchenAid, you can take advantage of the stronger motor which allows you to churn your ice cream surprisingly quickly (as compared to other comparable options on the market). The average churning times in most ice cream recipes seem to hover between 30 and 40 minutes. In my experience, I was able to churn a batch of ice cream or pistachio gelato as quickly as 15 minutes! My average churning time is around 20 minutes.
Helpful Info: The churning time will also depend on the viscosity (thickness) of your base. In simplified terms, the thinner (less viscous) the base the longer it will take to churn. I wanted to point this out to you since this relationship between the viscosity of your base and churning times is something that you don’t often see in ice cream cookbooks.
Helpful Info: Another benefit of using a KitchenAid is greater overrun. In other words, if you churn your ice cream with the KitchenAid machine you will end up incorporating more air into your ice cream (which will result in greater volume). If you know you will be making a lot of American style ice cream, the KitchenAid option might be your best affordable option (if you already have the machine itself of course). I have had great results churning American style ice creams using both Speed 1 and Speed 2 on the KitchenAid. We definitely cannot compete with commercial ice cream machines that are so insanely powerful that they can churn large quantities of ice creams in under 10 minutes with over 100% overrun but the KitchenAid does get surprisingly close with as much as 70% overrun!
Gelato on the other hand is traditionally churned slower producing a denser product with less overrun.
TIP 4.
Keep Track of Your Drawing Temperature: This is the temperature at which your ice cream is ready to go into the freezer, or the temperature that tells you your ice cream or gelato is done churning. According to Goff and Hartel’s 2013 ice cream making textbook, the ideal drawing temperature (for standard commercial ice cream machines) is between 23 F and 19.4 F or -5 C and -7 C. As a home ice cream maker if you can achieve 23 F or -5 C you are in great shape and will get wonderful results!
Helpful Info: But I did learn that there are actual benefits of aiming for a slightly lower drawing temperature for home ice cream makers. According to the Underbelly blog there are significant benefits of aiming for a lower draw temp in homemade ice cream machines. They suggest trying to extract your ice cream at 16 F or -9 C which will give you a smoother and creamier result! Just to be clear, most home ice cream machines can barely hit the 23 F. But! There are exceptions and this actually includes the KitchenAid attachment. Just to be extra clear, your ability to achieve a low drawing temperature depends on the freezing power of your machine! With my KitchenAid attachment I have been able to get it as low as 16 F, but I get around 20 F more consistently. If you can push the drawing temperature to around 16 F or -9 C let me know if you notice the difference in quality.
Helpful Info: Once you have reached your desired drawing temperature it is go time! This is where we need to move fast. We are trying to get our freshly churned ice cream into the freezer as quickly as humanely possible, with minimal melting. I will share more insights into the hardening phase in the next round of ice cream tips.
TIP 5.
Home Freezers Are Your Biggest Nemesis: I wanted to note an important drawback to pretty much all of homemade ice cream making. And that, my friends, are our freezers. Once your ice cream has reached that ideal draw temperature the goal is to get it to freeze or harden to -31 F or -35 C at which temperature no more ice crystals can be formed making sure the ice cream texture remains smooth after hardening. In order to achieve these super low temps you absolutely need a blast freezer. Asking our home freezers to do that is an impossible task. If you happen to have a super cool freezer that can achieve this, do let us know.
Helpful Info: If you are a real ice cream fanatic, and I haven’t tried this myself, but I really want to, you can actually make your own tiny blast chiller using store bought dry ice, a cooler or a Styrofoam box with a lid. This way you can blast chill your freshly churned ice cream. WHEN WORKING WITH DRY ICE SAFETY IS ESSENTIAL! Treat it like fire or acid, you absolutely can and will burn your flesh, eyes and soft tissues if you touch it. Protect your eyes, skin and lungs with proper personal protection equipment such as goggles, gloves and closed toe shoes. So please have all the safety measures in place before attempting this. If you are curious about this dry ice method my advice is to check out the The Wanderlust Creamery Presents ice cream book, the Blast Freezing section. If I end up doing this, I will make sure to share my experience since you all know how much I love making my own “machines” out of coolers lol.
TIP 6.
Experiment with Serving Temperature: Most American style ice creams are meant to be served somewhere between 7 F / 10 F or -12 C / -14 C, while gelato serving temperature is slightly higher at around 12 F or -11 C. This will usually take a couple of hours depending on your freezer and draw temperature.
Helpful Info: Serving temperature can also be a very personal thing. So definitely go with your gut on this one. One of the reasons I love gelato so much is because it is served at warmer temperatures. I am pretty sensitive to super cold ice cream (more on this in the future).
Helpful Info: My advice is to harden your ice cream or gelato to your preferred serving temperature and eat it that day! Not all of it of course, but if you love ice cream or gelato the best day to enjoy it, in my humble opinion, is the day it is made. Especially if you are not using any stabilizers or emulsifiers. I personally love freshly churned ice cream, so I tend to eat mine straight out of the machine, after having put the rest of it in the freezer first, of course!
That’s it for today! In the next round of tips we will look at the crucial role of invert sugars, the role of aging your bases, and much more!
I am so excited to continue to collect and share helpful ice cream making tips and information as I keep learning and researching this endlessly fascinating topic!
Do you have any ice cream or gelato making tips for me?
I would love to hear some of them.
In my next post, I will be sharing my first ice cream recipe for Malted Milk Ice Cream! The ice cream is super creamy and luxurious.
If you found this article helpful please share it with your ice cream and gelato loving friends.
Sounds good Olga. Let me know if I could help!
There is so much detail to making ice cream. You have really nailed it.